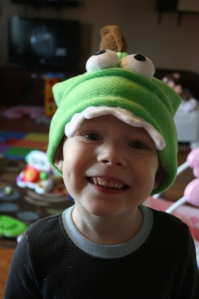
Last fall I couldn’t find a cute kids’ hat I liked. I did, however, come across a super cute book all about fleece animal hats. I then headed to JoAnn Fabrics and proceeded to use a 20% military Veteran’s Day discount on top of a 70% off fleece sale to load up on all the fleece I would make to do every hat in that book. We were in transition between bases and staying with my mom, so the fleece got dropped in the garage and left for awhile. Poor fleece got shoved in a bin and stored in the garage when we moved into our house on Fort Knox. It didn’t take long for me to haul that stuff out and get to it. In my opinion, the easiest was the dinosaur hat, so let’s start with that.
FLEECE DINO HAT (x-small & small)
What you’ll need:
Green fleece
Brown fleece
Polyester fiberfill
Beads or black felt, for the eyes. The first one I did beads, but then I started doing felt eyes to eliminate the possibility of beads coming off cause Lord knows my boys would yank on those suckers.
Needle for hand sewing
Thread; brown, white, and black
Measuring tape
Lots of patience
When I say this is easy, don’t mistake that for quick. These hats are not very fast to crank out because there’s a good bit of hand sewing. Let’s start with the basics. The body of the hat is the easy part, and is the same for all the hats.
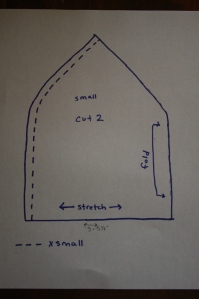
This is the top of the hat, small and extra small. You should be able to save this picture and print it out full page to use as the pattern. That was my goal, at least. The brim is pretty easy, you’ll need a big rectangle 6” wide… for small it needs to be 22” long, extra small 21” long. Cut it with the stretch horizontal, on the fold (11” small/ 10.5” extra small).
You’ll also need these…
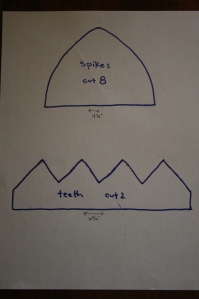
The teeth, spikes, and eyes. These eyes can be used for all the hats. If you’re going to use black felt for the pupils you’ll want to sew those on before you form and stuff the eyes, more on that soon.
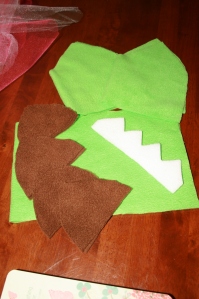
So, all the pieces cut, covered in fleece fluff pieces.
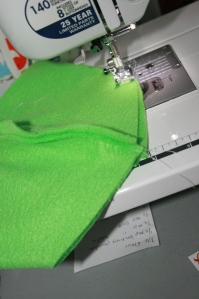
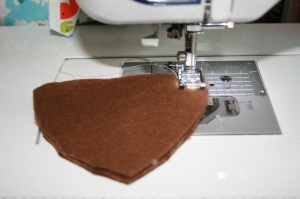
Making the basic hat is the easiest part. First, you’ll lay the top parts right sides together, machine stitch from the bottom of one side up to the top, repeat on the other side.
Then open it up and fold it so it forms a hump at the top. Machine stitch that hump. That’s the top of the hat. Easy peasy.
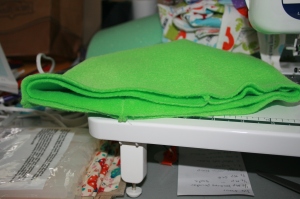
Next is the brim. Stitch the ends together to form a big loop. Then put the top of the hat inside the brim, with the wrong side of the hat facing the right side of the brim. Confusing yeah? Makes more sense later on. If you don’t want the seam of the brim directly lined up with the seam of the top, shift the brim so the brim seam is in between the top seams. It doesn’t really make a difference in this hat because you use the seam to line up the spikes. More on that later…
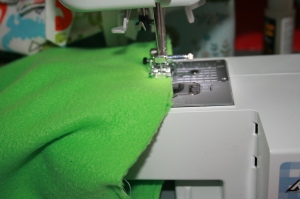
Now to stitch the brim to the top. Handy dandy tip alert! Take the little compartment off your machine that holds extra bobbins and machine feet and junk. Makes it easier to slide the hat on and just spin it around.
Once that’s done, turn your hat so the top is right side out. Hey that doesn’t look right! I totally agree, just wait for it. Fold the brim over towards the top, twice. Making any adjustments in length that you’d like. Maybe you have a kid with a long head, no judging. (Have you seen my two-year-old?)
ALERT!! If you’re joining us from another hat in the series to brush up on the basic hat shape, this is where you should go back to the hat you were looking at because there might be a variation. Alert over.
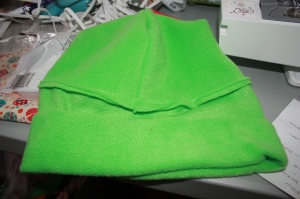
Continuing on, stitch the brim down about ¼” from the top.
There, basic hat done! Onto the dinosaur bits. First up, the spikes. Put them right sides together and stitch from one side, up and over the point to the other side. The sides look the same. No kidding. Which side looks fuzzier? That’s the right side. Trim around the edge to make it less bulky when you turn it right side out. Can you guess what comes next? Turn that sucker right side out. Machine stitch about ¼” in following the same path up did before. Repeat that for the rest of the spikes .
The teeth are the same idea… need a refresher? Sure why not! Right sides together, trim, turn right side out, topstitch, done.
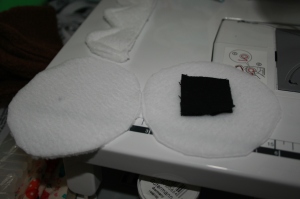
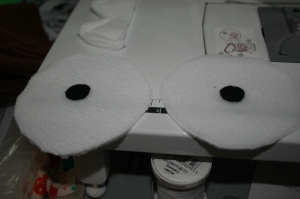
Unless you’re making some creepy version of this, you’ll need eyes. These start out deceptively easy, white circles from that eye template you saw earlier. Here’s your option on the pupils… you could use black beads (CHOKING HAZARD), or you could use some black felt or other material. I had some knit that I had used for a liner to something else. There’s no template for this, just cut a little circle till it looks normal.
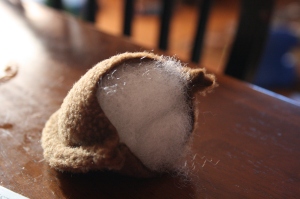
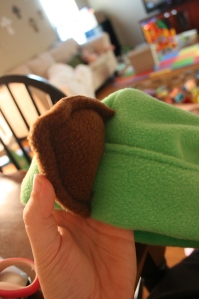
I’m sorry to say, from here on out it gets annoying tedious. Welcome to hand sewing mania!! First up, the spikes. Bust out your polyester fiberfill. Don’t have any? Pillow fluff works, or sacrifice a pillow that you put in the washer and it turned out all weird and lumpy. Don’t act like that’s never happened to you. So stuff the spikes with a good bit, enough to make sure they stay up when you sew them onto the hat. That’s right, you have to hand sew them onto the hat one at a time. Do a long running stitch to close the bottom so stuffing doesn’t come out when you’re wrestling it place on the hat.
Here comes the hard part. There’s no easy way to do this. Luckily there’s a little help with the line from the seam all the way across. Line up the first spike on that seam, starting at the bottom of the brim. Use that brown thread you got out.
As you sew it on, keep the stitches as close to under the spike as possible. One on either side of the seam works pretty well. You want them hidden. Keep going, one spike up against another until you’re bored to tears, have poked yourself with the needle at least six times, and have attached all four spikes.
The teeth are easier, I swear! Okay, marginally easier. Line up the teeth under the brim in the middle of that same seam the spikes are on. You know, so they’re nice and centered. They should only be under the brim about half an inch, enough that the teeth still stick out, then pin in place or that would get really tricky to sew.
Here’s where that “marginally” comes in… you don’t want the stitches from the teeth to come through to the front of the hat. The brim happens to be a double layer. So you have to pull the brim to make sure you’re only stitching through the bottom layer. It’s impossible to keep these stitches really close, so don’t worry about it. I went one way and then back to make sure it’s good and secure.
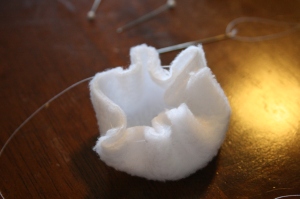
Last but not least, the eyes. Remember those fabric pupils? Sew those bad boys on with that black thread. To form the ball shape, do a basting stitch around the circle of the eye template and then pull it to make a little pouch.
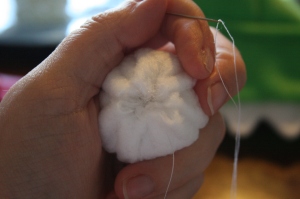
Take some more fluff and stuff the eye ball pouch, pull that basting stitch till it forms the whole shape. You’ll need to keep it pulled tight and then sew around to keep it shut. Nothing fancy, just around here and there till you don’t have to hold it.
Sewing these things on is no treat either. Keep the stitches under the eye, going through the side so it holds it in place without wobbling and being easily ripped out.
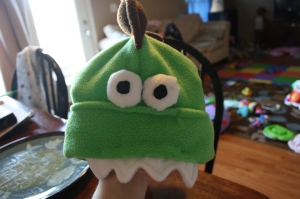
There you have it! Tired? So am I. However, as you may have noticed, this is a series, meaning more than one. So stay tuned for a lady bug, bee, goldfish, and panda. Happy sewing!














Pingback: fleece hats series part two: bumblebee | Try to keep up
Pingback: Fleece hat series part three: ladybug | Try to keep up
Pingback: Fleece hats series part four: panda | Try to keep up